Category: IoT

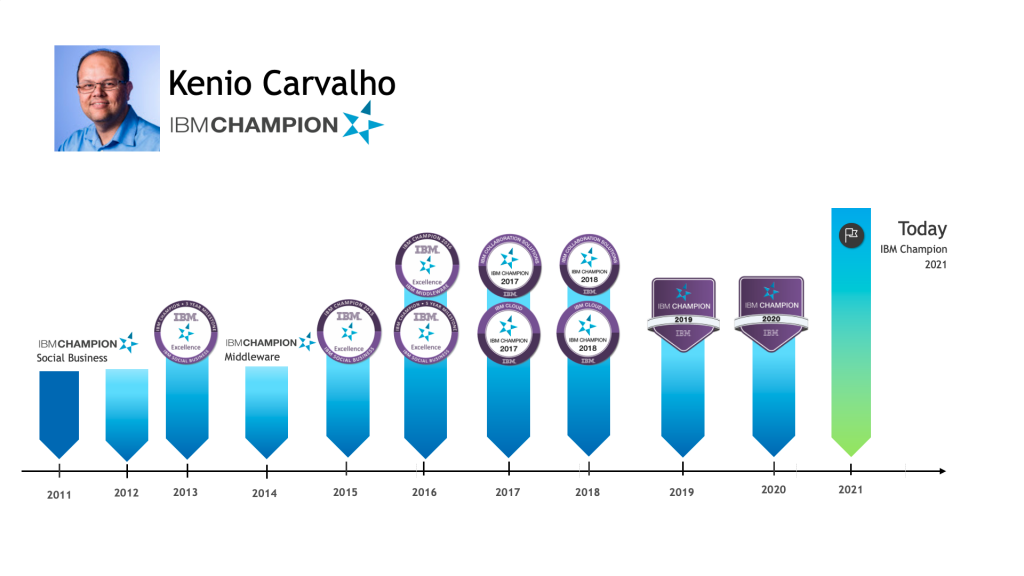
This history began in 2011 when the category IBM Champions for Social Business was created. At that time there were only 50.  During the following years I was also nominated in other categories such as IBM Middleware, IBM Cloud and recently IBM Watson IoT.

It is a journey of many years, a lot of learning and also knowledge sharing.


IoT

You can now package and deploy AWS Lambda functions as a container image of up to 10 GB.

This makes it easy to build Lambda based applications using familiar container tooling, workflows, and dependencies. Just like functions packaged as ZIP archives, functions deployed as container images will benefit from AWS Lambda’s operational simplicity, automatic scaling with sub-second startup times, high availability, and native integrations with 140 AWS services.

More information here

IoT

With new version of macOS released which is macOS Big Sur 11.0.x, the latest version of our VCP driver for Macintosh OSX (v5.3.5) now becomes incompatible.

The reason for this is because of new driver model change on macOS which you can find more information from links below:

https://developer.apple.com/documentation/macos-release-notes/macos-big-sur-11_0_1-release-notes
https://developer.apple.com/support/kernel-extensions/

We currently are working to update our driver to fix this issue, although due to testing requirements, we do not expect the new version of driver to be available on our website for now. So please be up to date on our page for VCP drivers below for latest information regarding to the release of the updated VCP driver for macOS Big Sur 11.0.x:

https://www.silabs.com/products/development-tools/software/usb-to-uart-bridge-vcp-drivers

My upgrade to Big Sur will not be possible without this driver. 🙁

IoT

A device that has a temperature sensor in an office might report temperature in degrees Fahrenheit or in degrees Celsius. It is not efficient to configure applications to be able to consume data in all these formats. Instead, the data needs to be collected, transformed, and normalized to create a single logical model so that an application can interact with the different devices in the same way.

The data management component of Platform Service includes a device twin feature and an asset twin feature. The device twin feature lets you take advantage of the collection, transformation, and normalization of different formats of device data into a single logical model. The asset twin feature lets you group different devices together to create a Thing, which is a higher value asset-based data structure. You can even group Things together to create new Things. An application can interact with the logical model, regardless of the data format that is used by the individual devices or Things.

For example, a group of devices that report temperature, humidity, and ambient light can be aggregated into a “Room” Thing to represent the comfort level in a specific office. A number of “Room” Things can be aggregated into a “Floor” Thing to represent all offices on a specific level, and a number of “Floor” Things can be aggregated into a “Building” Thing. By using a Thing abstraction, your application is decoupled from the specifics of how the devices are connected, the format in which the devices publish event data, and how the data is combined.

The explanation above i got from the knowledge center, just to  introduce about a problem i  got last week.

The problem:  When we create device types  we must define a Hardware and a Logical interface. When we create  the interfaces we are modeling the schema of a table were data will be saved. You can define “the fields and his type”. As usual i create my interfaces, devices and put the sensors to send data, but some sensors are not sending one of the variables. For example the data expected was { voltage : value , kwh: value) but the sensor send {voltage: value}.  The data is not saved on the database.

To solve the problem i create a ticket and the answer was to test if a key exists if not save it as a null value.

On the logical interface, for each key i need to put the following (example for kwh) : $exists($event.kwh) ? $event.kwh(null)
IoT

I setup Node-red to use HTTPS and everything works fine. All HTTPS requests go to default port of Node-red.  Today i need to setup a communication with a client that not support HTTPS, just HTTP.

The solution i found was to setup Nginx as reverse proxy.  Nginx receives the HTTP requests and then forward them to Node-red.

On my Nginx server i just add the following lines

server {
listen 80;
location /reddata {
proxy_pass https://<ipaddress>:port/reddata;
}
}


IoT Linux

“ImportError: No module named tensorflow” but you know you installed it? Sometimes you can import packages from the console, but not from the Jupyter notebook? !pip install tensorflow sometimes just does not work?

Googling about similar issues made me realise people are suggesting the thing that won’t work most of the time.

If you are installing packages by running

!conda install tensorflow
# or if you want to use pip
!pip install tensorflow

you are using very fragile commands (if run in notebook) and that’s the reason packages you installed can’t be imported. It is not fine this time

Instead, use these commands:

import sys
!conda install --yes --prefix {sys.prefix} tensorflow
# or if you want to use pip
!{sys.executable} -m pip install tensorflow

and you will not have problems with damn ImportError again.

Found this information on this link https://modelpredict.com/importing-packages-in-jupyter-notebook/

IoT

Sharpening a knife is a skill that everyone who enjoys cooking needs to have. I have several stones for sharpening my knives. In addition to having the correct stones one of the most difficult things is to maintain the angle between the knife and the stone during the sharpening process. There are many videos and even YouTube channels on the subject. A video that caught my attention is below. It shows how to create and use an electronic device to maintain the sharpness angle.


IoT

You need A Fully Qualified Domain Name (FQDN) pointing to a dedicated IP address of the webserver.
This needs to be configured by your DNS administrator or provider.

1 – Install Certbot in Centos 8

sudo curl -O https://dl.eff.org/certbot-auto
chmod 0755 /usr/local/bin/certbot-auto

2 – Configure Nginx server_name on nginx.conf

Edit nginx.conf an change the variable server_name to the same FQDN
of your server for example: server_name www.mysphere.com.br;

3 – Run the certbot command:

Execute sudo /usr/local/bin/certbot-auto –nginx and follow the instructions

Test if your Nginx server using https://<server_name>

IoT Linux web

I am creating a server (Centos 8) to develop a system that will use an application using REACT as a front end to show data from different sensors. I will use NGINX as a webserver and Node-red as a back end. In this first post I describe how to install NGINX.

Install nginx package using the yum command on CentOS 8:

sudo yum update
sudo yum install nginx

Update firewall settings and open TCP port 80 and 443. Run:

sudo firewall-cmd –permanent –zone=public –add-service=https –add-service=http
sudo firewall-cmd –reload

Enable nginx service by running systemctl command so that it starts at server boot time:

sudo systemctl enable nginx

start the service, run:

sudo systemctl start nginx

Commands to start/stop/restart nginx server

Run command as per your needs.

sudo systemctl start nginx  <– start the server ##
sudo systemctl stop nginx  <– stop the server ##
sudo systemctl restart nginx  <– restart the server ##
sudo systemctl reload nginx  <– reload the server ##
sudo systemctl status nginx  <– get status of the server ##

You must open and enable port 80 and 443 using the firewall-cmd command:

sudo firewall-cmd –permanent –zone=public –add-service=http –add-service=https
sudo firewall-cmd –reload
sudo firewall-cmd –list-services –zone=public

Now nginx is installed. Bellow are some important directories (defaults) i

Config directory – /etc/nginx/
Maibn global config file – /etc/nginx/nginx.conf
TCP ports opened by Nginx – 80 (HTTP), 443 (HTTPS)
Default web document root directory – /usr/share/nginx/html
Access log file – /var/log/nginx/access.log
Error log file – /var/log/nginx/error.log

IoT Linux web

Node-Red 1.0 released today.

Some new features:

Asynchronous message passing

This release changes the message passing between nodes to be always asynchronous rather than it being sometimes asynchronous and sometimes synchronous depending on the implementation of individual nodes.

Node Send API

Nodes now have a new API available for how they handle messages in the runtime. This API allows them to tell the runtime when they have finished with a message.

This will help the runtime to track nodes as they flow through the system – enabling future features such as automatic timeouts of nodes.

To go along with this change, we’ve introduced a new Complete node. This node can be targeted at another node, like the Catch node, and it will be triggered when the targeted node finishes handling a message.

Cloning messages

A knock-on effect of the async messaging change is a change to how the Function node clones messages. It used to avoid cloning messages if it could, but this led to hard to detect issues once the async message change was introduced.

So now the Function node will also clone all of the messages you pass to node.send().

If you have a flow that depends on the message not being cloned, you’ll need to update your flow to request the runtime not to do the cloning.


Read  more information here


IoT

One of my apps does not start after a restart. I changed several things on the Node-Red app and i think the restart will be a good idea.

On the logs view there was no good messages to see what is happening with Node-Red

So i start the terminal and go to use IBM cloud CLI

to get the app log just logon and type ibmcloud cf logs [appname] > log.txt

I saw the following messages

[CELL/0] OUT Cell a64da35a-93fb-4f76-abd8-219869380b84 creating container for instance 6b30e79e-2853-4199-4c3e-1cc0
2019-09-04T13:54:47.36-0300 [CELL/0] OUT Cell a64da35a-93fb-4f76-abd8-219869380b84 successfully created container for instance 6b30e79e-2853-4199-4c3e-1cc0
2019-09-04T13:54:55.45-0300 [CELL/0] OUT Starting health monitoring of container
2019-09-04T13:55:06.64-0300 [APP/PROC/WEB/0] OUT > [email protected] start /home/vcap/app
2019-09-04T13:55:06.64-0300 [APP/PROC/WEB/0] OUT > node –max-old-space-size=180 index.js –settings ./bluemix-settings.js -v
2019-09-04T13:55:06.98-0300 [APP/PROC/WEB/0] OUT 4 Sep 16:55:06 – Starting Node-RED on IBM Cloud bootstrap
2019-09-04T13:55:06.98-0300 [APP/PROC/WEB/0] OUT 4 Sep 16:55:06 – Loading bluemix-settings.js
2019-09-04T13:55:07.18-0300 [APP/PROC/WEB/0] OUT 4 Sep 16:55:07 – Failed to find Cloudant service: /^IoT-Cool.cloudantNoSQLDB/
2019-09-04T13:55:07.19-0300 [APP/PROC/WEB/0] ERR module.js:478
2019-09-04T13:55:07.19-0300 [APP/PROC/WEB/0] ERR throw err;
2019-09-04T13:55:07.19-0300 [APP/PROC/WEB/0] ERR ^
2019-09-04T13:55:07.19-0300 [APP/PROC/WEB/0] ERR Error: Cannot find module ‘./node_modules/node-red/red/runtime/storage/localfilesystem’

Node-Red was unable  connect to Cloudant. But not was changed on Cloudant side.

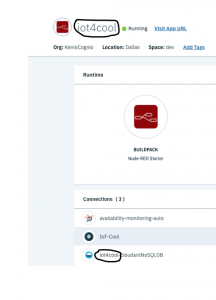
I changed the Title of the app to another name before the restart, that was the cause of the problem.

I think there is a relation between the APP name and the Cloudant Service linked to the app

After i change the app name to the old one, Node-Red starts again.


IoT Uncategorized

Rules are key elements for an IoT solution. Using rules you can trigger an action or send an alert any kind of notification.
IBM update his platform and now you can create rules using a graphical interface.

The key part of a rule is the expression that will be evaluate to true or false.  The expression language are built using JSONata.
JSONata is a lightweight query and transformation language for JSON data.

The point is that IBM are using JSONata v1.4x. and the current version of JSONata is v1.6.5. The versions have lots of difference.
Yesterday i was writing a rule to get the hour for an event. If you are using v1.6.5 you can use the function $fromMilllis with picture.
$fromMillis(1510067557121, ‘[H01]’, ‘-0500’) => “10”
But Watson IoT are using v1.4x  and $fromMillis doesn’t have the picture implemented. The only way i found is to manipulate strings and i got the following expression:

$number($substring($fromMillis($state.datahora),11,1)) < 1 and $number($substring($fromMillis($state.datahora),12,1)) < 3 ? $number($substring($fromMillis($state.datahora),12,1))+24-3 : $number($substring($fromMillis($state.datahora),11,1))*10+ $number($substring($fromMillis($state.datahora),12,1))-3
$state.datahora returns an epoch timestamp.
This expression returns the hour on my timezone (-3). If anyone have a more elegant solution post on comments. I know my solution can’t be the better one, but it works.

IoT